How to Enable Webcam on Chromebook (Step-by-Step Guide)
Published: 21 Jan 2026
Are you facing a problem with your Chromebook’s webcam? Don’t worry—you’re not alone! Whether you’re trying to join a video call, attend a class, or hop into a virtual meeting, I’m here to help.
In this guide, I’ll teach you how to enable a webcam on Chromebook, troubleshoot common issues, and even connect an external webcam if needed. Whether it’s your first time setting up the camera or you’re troubleshooting a challenging problem, you’re in the right place. Let’s get started!
Why Enable Your Webcam?
Webcams are essential for many modern tasks, such as video calls, online classes, and virtual meetings. But what happens if your webcam doesn’t work when you need it most? Sometimes, it’s just a permissions issue. Other times, it could be a deeper problem.
This guide ensures you don’t miss a step so that you can confidently enable your Chromebook’s webcam, troubleshoot issues, and get back to what matters most: interacting with people.
How to Enable Your Chromebook Webcam
Let’s start by enabling the webcam already built into your Chromebook.
Method 1: Using Chromebook Settings
This method works best for most users because it directly adjusts the permissions for your device’s built-in camera.
Step 1: Open Chromebook Settings
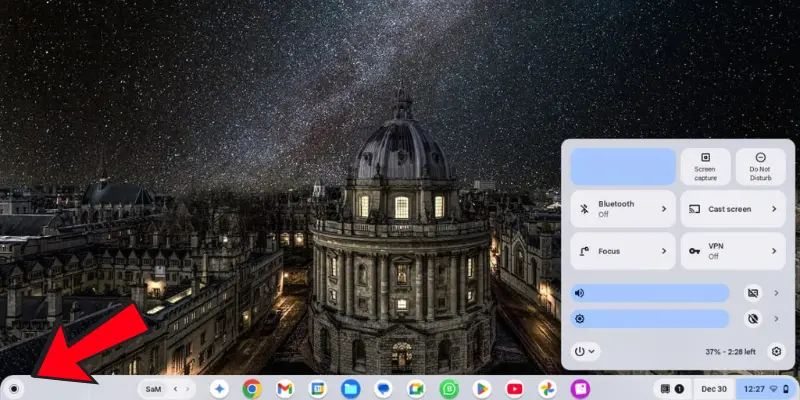
- Click the Launcher in the bottom-right corner of your screen.
- Click the gear icon to open the settings panel in the pop-up menu.
Why This Step?
The settings menu controls all hardware permissions, including the webcam. Without enabling access here, apps cannot use your camera.
Step 2: Navigate to Privacy and Security
- Scroll down the Settings panel to find “Privacy and Security.”
- Click this section to access permissions for your camera.
Step 3: Enable Camera Permissions
- In the Privacy and Security menu, look for the Camera toggle.
- Make sure it’s switched to ON.

Below the toggle, you’ll see a list of apps that have requested access to the camera. Make sure important apps like Zoom, Google Meet, and Skype have permission to use the camera.
| 💡Tip: |
|---|
Apps often need specific permissions to use your camera. Double-check that the apps you use most frequently are listed here and allowed access. |
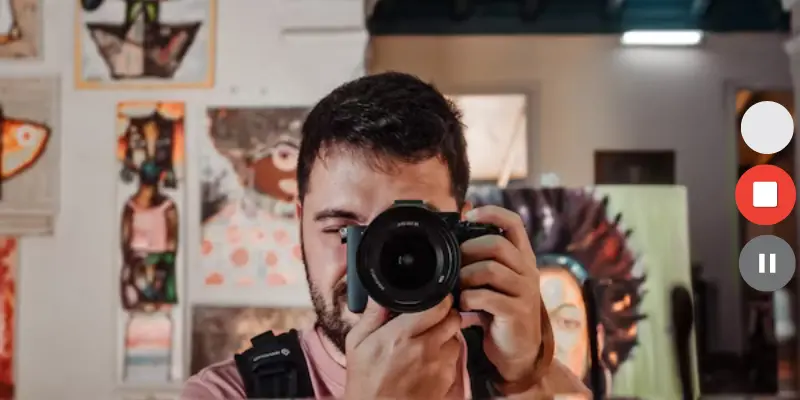
Step 4: Test the Webcam
- Open the Camera app to test your webcam.
- To find it, click the Launcher (circle icon at the bottom-left corner of the screen) and type “Camera” in the search bar.
Open the app and check to see if your webcam works. You should see a live preview of yourself on screen.
What If It Doesn’t Work?
If the preview doesn’t show anything, you may need to adjust permissions again or use an alternate method below.
Method 2: Using Chrome Browser
Sometimes, adjusting your Chromebook’s global settings isn’t enough. If your camera still doesn’t work, try enabling it through the Chrome browser.
Step 1: Open Chrome Settings
The first step is to access Chrome’s camera settings directly. This shortcut saves time and takes you straight to the right place.
- Open the Chrome browser on your Chromebook.
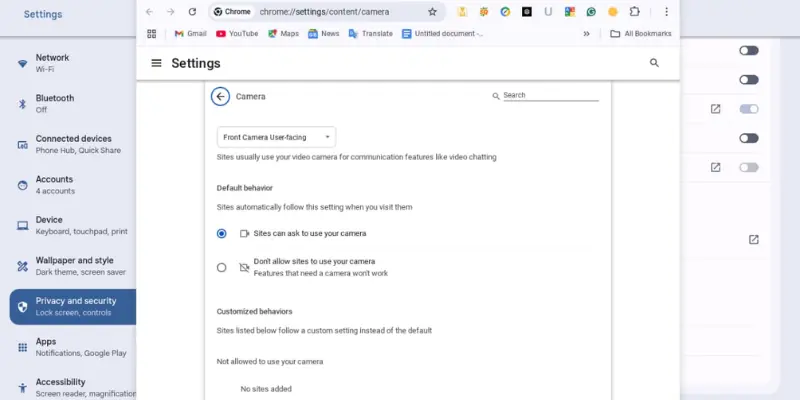
- Type chrome://settings/content/camera into the address bar and Press Enter.

Step 2:Pick Your Camera.
If you have multiple webcams, like a built-in one and an external one, you need to select the right one to use.
- Choose the camera you want from the dropdown menu.
- If you prefer to use an external camera, make sure it is attached.
Step 3:Set Permissions
Permissions can block or allow your camera to work with apps and websites. Adjust them to ensure everything runs smoothly.
- Turn ON the option that says “Ask before accessing.”
- Check the “Blocked” and “Allowed” lists under permissions.
- Move apps like Google Meet or Zoom to the “Allowed” list if they’re blocked.
Step 4:Test Your Camera.
After making these changes, it’s important to check if everything is working properly.
- Open an app like Google Meet or the Chromebook’s Camera app.
- Check that your camera is now functioning properly.
| 💡Quick Tip: |
|---|
If your camera still isn’t working, double-check site permissions. Sometimes a small setting can make a big difference! |
Troubleshooting Webcam Problems
Even if you turn on the webcam, it might not work sometimes. Don’t worry; most problems can be resolved quickly. Here are some simple steps for troubleshooting the issue.
1. Restart Your Chromebook
A quick restart can solve many issues, including problems with your webcam. Restarting refreshes your system and can fix minor bugs or glitches.
- Press the power button on your Chromebook.
- Select “Restart” from the menu or turn it off and on again.
2. Update Your Chromebook
Outdated software can cause compatibility issues, including problems with your camera. Updating ensures you have the latest features and bug fixes.
- Go to Settings on your Chromebook.
- Navigate to About ChromeOS and select Check for Updates.
- Install any available updates and restart your Chromebook.
3. Check Permissions Again
Even if you’ve already set permissions, it’s a good idea to double-check. Permissions sometimes get reset or overlooked during updates or app installations.
- Open Settings and go to Privacy and Security.
- Confirm that the camera is turned ON.
- Revisit the permissions in chrome://settings/content/camera to ensure apps like Google Meet or Zoom have access.
| 💡Quick Tip: |
|---|
If none of these steps work, consider using an external webcam or contacting Chromebook support for further help. |
Using an External Webcam (Quick Overview)
If your Chromebook’s built-in webcam does not work or you need better video quality, you can use an external webcam. Simply plug the webcam into your Chromebook’s USB port, and it will be detected quickly.
Quick Tips for Better Webcam Use
Want to look your best on video calls? These quick tips will help you improve your webcam experience.
- Good Lighting: Sit in a bright place, preferably facing a window or a soft light source. Avoid backlighting, which can create shadows or make you appear dark.
- Eye Level: Place your webcam at eye level for a natural angle. Use books or a stand to adjust the height, and look directly at the camera during calls.
- Clean the Lens: Wipe your camera lens with a microfiber cloth to remove smudges for a clear, sharp video feed.
- Close Unused Apps: Close all video and camera-related apps before starting a call. This ensures your webcam isn’t blocked by another app and helps your video run smoothly.
- Check App Camera Selection: Make sure the correct webcam is selected in apps like Zoom or Google Meet, especially if using an external camera.
- Test Before Calls: Open the Camera app or a video tool to check your lighting, focus, and angle. Testing beforehand ensures you look clear and professional on screen.
- Sit in a Quiet Place: Choose a quiet room to minimize background noise and distractions. A calm environment helps you stay focused and look more professional.
| 💡Pro Tip: |
|---|
Combine these tips for a sharp, professional look every time! |
Conclusion
In this guide, I’ve shown you how to enable a webcam on a Chromebook, fix common problems, and even connect an external webcam if needed. By adjusting permissions and selecting the right settings, you now have everything you need to get your Chromebook’s webcam working smoothly.
Technology can sometimes be tricky, but with patience and small steps, you can solve most issues. Whether it’s for a class, a meeting, or a quick chat, you’re now ready to use your Chromebook’s webcam confidently. If you still have any questions or face issues, feel free to ask in the comments—I’d be happy to help!
Frequently Asked Questions (FAQs)
Here are some of the most frequently asked questions about Enable Webcam on Chromebook.
Yes, restarting often fixes temporary glitches and camera issues by refreshing system processes.
If your Chromebook camera isn’t working, try these steps:
- Restart your Chromebook: A simple restart often fixes minor glitches.
- Check permissions: Check that camera permissions are enabled in Settings > Privacy and Security or in Chrome (chrome://settings/content/camera).
- Update ChromeOS: Go to Settings > About ChromeOS and check for updates.
- Consider an External Webcam: If the built-in camera still doesn’t work, using an external webcam can be a great alternative.
Yes, you can use an external webcam by plugging it into a USB port. Chromebooks automatically detect the camera. If needed, make sure to select the external camera in the app or browser settings.
Most USB webcams work with Chromebooks without needing extra software. Popular options include Logitech webcams, which are known for their compatibility. Plug in the webcam, and your Chromebook will automatically recognize it.
Yes, managed Chromebooks may have camera restrictions set by an administrator. In this case, only the admin can enable camera access.
Open the app you’re using (like Zoom or Google Meet) and select the camera you want from the camera settings menu.
This usually means an app is blocking the camera, or the wrong camera is selected. Close other apps, then recheck the camera selection.
Yes, almost all Chromebooks come with a built-in webcam that works automatically once permissions are allowed.
Lag can be caused by low system memory, many open tabs, or a slow internet connection. Close unused tabs and apps to improve performance.
Most Chromebooks don’t have a dedicated camera key, but you can quickly open the Camera app from the Launcher.


- Be Respectful
- Stay Relevant
- Stay Positive
- True Feedback
- Encourage Discussion
- Avoid Spamming
- No Fake News
- Don't Copy-Paste
- No Personal Attacks
- Be Respectful
- Stay Relevant
- Stay Positive
- True Feedback
- Encourage Discussion
- Avoid Spamming
- No Fake News
- Don't Copy-Paste
- No Personal Attacks
