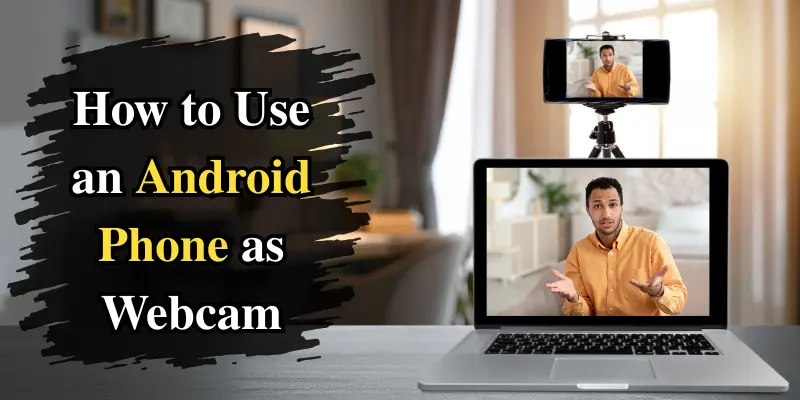
How to Use Android Phone as Webcam: Easy Setup Guide
Published: 9 Dec 2025
In today’s world of video calls, streaming, and online meetings, a good webcam makes a big difference. But if you don’t have one or your current webcam falls short, don’t worry! Your Android phone can easily serve as a high-quality webcam for all your online needs.
In this guide, we’ll show you how to turn your Android phone into a webcam, covering various platforms and software like PC, Mac, OBS, and more. Let’s get started and have you set up quickly!
What You Need to Turn Your Android Phone into a Webcam
Before we dive into the step-by-step process, let’s make sure you have everything you need:
1. An Android Phone: Any Android phone with a decent camera (preferably the back camera for better quality) will do the job.
2. A Stable Internet Connection: If you’re using a Wi-Fi method, ensure you have a good Wi-Fi connection for smooth streaming.
3. USB Cable (Optional): If you prefer a wired connection, you’ll need a USB cable to connect your phone to your PC or Mac.
4. Webcam Apps: There are several apps that can help you turn your Android phone into a webcam. Here’s a quick comparison of the most popular options:
| App | Platforms Supported | Connection Type | Free Version Available? | Best For |
|---|---|---|---|---|
| DroidCam | Windows, Linux, macOS | USB, Wi-Fi | Yes | General use, budget-friendly |
| Iriun Webcam | Windows, macOS, Linux, Android | USB, Wi-Fi | Yes | Streamers, those looking for higher resolution |
| Camo | macOS, Windows, iOS | USB | No | Professionals, content creators |
| EpocCam | Windows, macOS, iOS | USB, Wi-Fi | Yes | Versatile users, iOS compatibility |
5. A Laptop/PC or Mac: Of course, you’ll need a device to connect your phone to. We’ll cover setups for both Windows and Mac.
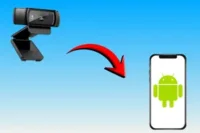
How to Use an Android Phone as a Webcam
Now that you’re all set, let’s turn your Android phone into a webcam. It’s easier than you think—just follow these simple steps for both wired and wireless setups.
Step 1: Download and Install the Webcam App
Choose a popular webcam app like DroidCam, Iriun Webcam, or Camo. Download and install the app on your Android phone.
Step 2: Install the Companion Client on Your PC/Mac
Next, download and install the companion client (software) for your chosen app on your Windows or Mac. This step is necessary for your phone to be recognized as a webcam on your computer.
Step 3: Connect Your Phone to Your PC/Mac
You have two connection options:
- USB: Turn on USB debugging in your phone’s Developer Options and connect your phone to your computer using a USB cable.
- Wi-Fi: Ensure both your phone and computer are connected to the same Wi-Fi network. Open the app on both devices.
Step 4: Verify the Connection
Launch the app on both your phone and your computer.
- For USB: The app should automatically detect your phone.
- For Wi-Fi: Enter the IP address shown on your phone into the client on your computer to establish the connection.
Step 5: Use Your Phone’s Camera
Once the connection is made, open any video calling or streaming app (Zoom, Skype, OBS, etc.), and select your phone’s camera app (e.g., DroidCam, Iriun, or Camo) as the camera source.
Troubleshooting Common Issues
While turning your Android phone into a webcam is generally a smooth process, sometimes issues can arise. Here are some common problems and their solutions:
- Connection Problems: Make sure USB debugging is enabled if you’re using a wired connection. For Wi-Fi, ensure both your phone and computer are on the same network.
- Low Video Quality: If the video quality is low, check your camera settings and ensure you’re using the back camera of your phone. Also, try switching from Wi-Fi to USB for a more stable connection.
- Audio/Video Sync Issues: If there’s a delay between audio and video, try reducing the video quality or frame rate, or switch to a different app (e.g., Iriun Webcam often handles this better than others).
Important Tips for Using Android as a Webcam
To get the best performance and video quality when using your Android phone as a webcam, follow these essential tips:
- Use the Back Camera: For better video quality, always use the back camera of your phone.
- Keep Your Phone Charged: Plug in your phone while using it as a webcam to prevent battery drain.
- Ensure a Stable Connection: Use a USB connection for better stability and higher video quality, but Wi-Fi is fine for casual use.
- Position Your Phone at Eye Level: Keep the phone at eye level for a natural, flattering angle during calls or streaming.
- Use a Tripod or Stand: Stabilize your phone with a tripod or stand to avoid shaky video.
- Adjust Lighting: Use soft, natural light in front of you to avoid shadows and ensure clear visibility.
- Close Unnecessary Apps: Close any apps running in the background to free up resources and improve performance.
- Test Your Setup: Always do a quick test before your meeting or stream to check video and audio quality.
Conclusion
Turning your Android phone into a webcam is a simple and effective solution for better video calls and streaming. By following the steps in this guide and using the right apps, you can enjoy high-quality video without the need for an expensive webcam. Whether using a wired connection for stability or Wi-Fi for convenience, your phone can easily handle online meetings and streaming.
Follow the troubleshooting tips and best practices for optimal performance, and you’ll never have to worry about poor video quality again!
Frequently Asked Questions (FAQs)
Here are answers to some of the most common questions about how to use Android phone as a webcam:
To use your Android phone as a webcam for Zoom, download a webcam app like DroidCam or Iriun on your phone and PC. Connect your phone to the PC via Wi-Fi or USB, then select your phone’s camera as the video source in Zoom’s settings.
Yes, you can use your Samsung phone as a webcam for Windows. Simply install a webcam app like DroidCam or Iriun on both your phone and PC, and connect them via USB or Wi-Fi. Then, choose your phone’s camera as the webcam source in any video calling app.
Unfortunately, you need a webcam app to turn your Android phone into a webcam. Apps like DroidCam, Iriun, and Camo act as a bridge between your phone and your computer to enable it to work as a webcam.
All you need is your Android phone, a stable internet connection (Wi-Fi or USB), and a webcam app like DroidCam or Iriun. If you prefer a wired connection, you’ll need a USB cable to connect your phone to your computer.
To prevent your phone’s battery from draining, always plug it in while using it as a webcam. This will ensure that the phone stays powered throughout the call or stream, especially during long sessions.


- Be Respectful
- Stay Relevant
- Stay Positive
- True Feedback
- Encourage Discussion
- Avoid Spamming
- No Fake News
- Don't Copy-Paste
- No Personal Attacks
- Be Respectful
- Stay Relevant
- Stay Positive
- True Feedback
- Encourage Discussion
- Avoid Spamming
- No Fake News
- Don't Copy-Paste
- No Personal Attacks
