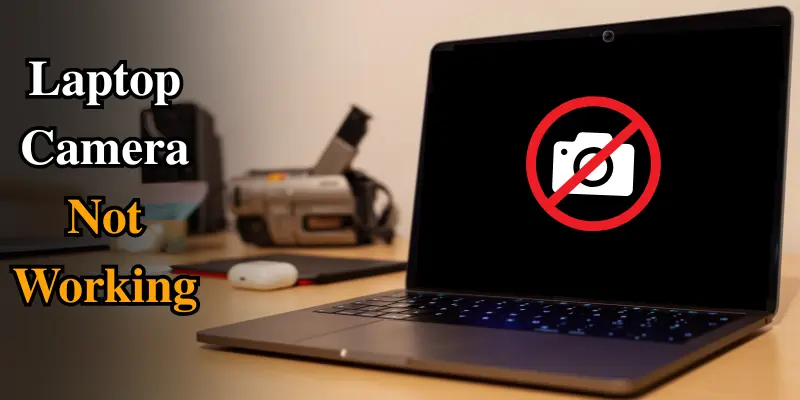
Laptop Integrated Webcam Not Working? Fix It Fast with These Steps
Published: 23 May 2025
Having issues with your laptop camera? You’re not alone! Many users face this frustrating problem, whether it’s for video calls, meetings, or simply taking a quick photo. Luckily, fixing it is usually easier than you think.
In this article, we’ll explain the common reasons why your laptop camera might not be working and provide practical, step-by-step solutions. So, let’s dive in and get your camera back up and running!
Why Is Your Laptop Camera Not Working? Common Causes
Before jumping into the fixes, it’s important to understand why your laptop’s integrated webcam is not working. Here are some common reasons:
- Software Glitches: Sometimes, a simple bug or conflict between apps can cause the camera to stop working.
- Outdated or Corrupted Drivers: If your camera driver is outdated or corrupted, the camera might not function correctly.
- Privacy Settings: Your laptop’s privacy settings may prevent apps from using the camera.
- Hardware Issues: Although less common, physical damage to the camera or its connections can also cause issues.
| Note: |
|---|
These solutions are only for Windows laptop camera issues. If you’re using a Mac and your MacBook camera isn’t working, don’t worry — we’ve created a separate guide for Mac users. |
How to Fix Your Laptop Camera: Step-by-Step Instructions
Let’s go over the most effective troubleshooting steps to get your camera working again. Try these solutions one by one, and you’ll be back to video chatting in no time!
1. Restart Your Laptop
Sometimes, the simplest solution is the most effective. Restarting your laptop can help resolve any temporary glitches or conflicts. This helps refresh the system and can often fix minor camera issues.
2. Check the Physical Camera Switch or Lens Cover
Some laptops have a physical switch to turn the camera on or off, or a lens cover to protect it. If your camera isn’t working, check to see if the lens is covered or if the camera has been turned off manually.
3. Update Your Camera Drivers
Outdated or corrupt drivers are one of the most common reasons your camera might not work. Here’s how to update your camera drivers:
- Press Windows + X, then select Device Manager.
- Find Imaging Devices, and right-click on your camera (e.g., Integrated Webcam).
- Select Update Driver, then choose Search automatically for updated driver software.
If updating doesn’t help, right-click the camera and select Uninstall Device, then restart your laptop to reinstall the driver.
4. Adjust Privacy Settings
Your laptop’s privacy settings may block camera access. To ensure apps can use your camera, follow these steps:
For Windows 11:
- Go to Settings > Privacy & Security > Camera.
- Toggle Camera access to On.
- Toggle Let apps access your camera to On.
- Make sure apps like Zoom, Skype, and Teams have access by turning them on.
For Windows 10:
- Go to Settings > Privacy > Camera.
- Toggle Allow access to the camera on this device to On.
- Toggle Allow apps to access your camera to On.
- Make sure apps like Zoom, Skype, and Teams are enabled.
5. Run the Windows Camera Troubleshooter
If your camera is still not working, use the built-in Windows Troubleshooter. It can automatically detect and fix issues with your camera:
1. Go to Settings >
- For Windows 11: System > Troubleshoot
- For Windows 10: Update & Security > Troubleshoot

2. Select Other troubleshooters (Windows 11) / Additional troubleshooters (Windows 10).
3. Click on Camera under Find and fix other problems (Windows 11) / Camera (Windows 10).
Let the system scan for issues and follow the prompts to fix any problems.
6. Test the Camera in Multiple Apps
Sometimes the problem is specific to one app. If the camera works in one app but not another (like Zoom or Skype), it may be a settings issue within the app itself. Check the camera settings in the app and ensure the right camera is selected.
Before joining a meeting or an important video call, you can fully test your laptop camera using our free online tool. It helps ensure your camera is working properly.
👉 Use our Camera Test Online Tool here.
Advanced Solutions if the Camera Still Isn’t Working
If the basic troubleshooting steps haven’t resolved the issue, here are a few more advanced solutions to try:
1. Uninstall Recent Windows Updates
Sometimes, a recent update could cause issues with hardware like your camera. To uninstall recent updates:
- Go to Settings > Update & Security > Windows Update.
Select View update history and uninstall the latest updates that might have caused the issue.
2. Check for Conflicts in Device Manager
Check Device Manager for conflicts with your webcam:
- Go to Device Manager, expand the Imaging Devices section, and right-click your camera.
- If you see a yellow exclamation mark, it indicates a driver conflict. Right-click and select Update Driver or Uninstall Device.
3. Perform a System Restore
If previous fixes didn’t work, try a system restore to roll back your laptop to a time when the camera was working. This should be a last choice because it will undo recent changes made to your system, like updates or new software installations.
How to Perform a System Restore:
- Press Windows + R, type rstrui, and press Enter.
- Select a restore point from when your camera was working.
- Click Next and then Finish to start the restore process.
- Once complete, your laptop will restart. Check if the camera is working.
| Note: |
|---|
System restore doesn’t affect personal files, but it will remove recent apps, updates, and drivers. |
What If Your Laptop Camera Is Physically Broken?
In rare cases, the camera itself might be physically damaged or malfunctioning. If your camera is still not working after trying all the above solutions, it’s time to check if the camera is physically broken. This could be due to a loose connection, physical damage, or faulty hardware.
If you detect hardware issues, it’s best to contact your laptop manufacturer or visit a professional repair service.
How to Prevent Camera Issues in the Future
To avoid experiencing camera problems again, here are some helpful tips:
- Regularly Update Drivers: Make sure your camera drivers are always up-to-date to avoid conflicts and bugs.
- Use Privacy Settings Wisely: Ensure that apps have permission to access your camera and disable it when not in use.
- Perform Regular System Maintenance: To keep everything running smoothly, check for updates, clean your laptop, and scan for malware regularly.
Conclusion
Dealing with a Laptop camera that’s not working can be irritating, but with the right steps, it’s usually a fixable problem. By following the troubleshooting steps given in this article, you can get your camera back to full functionality in no time!
If your laptop camera still isn’t working after trying all the solutions, don’t hesitate to contact laptop support or take it to a professional for repair. And remember, if you have any other camera-related questions, feel free to explore our other posts!
Frequently Asked Questions (FAQs)
Here are answers to some of the most common questions about a laptop camera not working:
If your camera isn’t working after a Windows update, first check if your camera drivers need to be updated. Sometimes, an update can cause driver conflicts or issues. You can also try uninstalling the recent update and see if that fixes the problem.
If your laptop camera is damaged, it’s likely a hardware issue that can’t be fixed through software troubleshooting. You should contact your laptop’s support team or take it to a professional repair service. They can diagnose the problem and help with the repair or replacement.
If your computer camera is not working, the issue could be with the drivers, privacy settings, or an app conflict. Start by checking if your camera is enabled in the settings and that no apps are blocking it. Also, confirm that your drivers are up to date.
If your integrated webcam is not showing in Device Manager, it could be due to a missing or corrupted driver. Try restarting your computer, and if the issue persists, update or reinstall your webcam driver. If you detect a hardware issue, you can also check the device connection.
If your integrated webcam is not working on Teams, first check if Teams has permission to use the camera in your privacy settings. Then, make sure no other apps are using the camera at the same time. Finally, try restarting Teams or your computer to fix any minor glitches that could be causing the issue.


- Be Respectful
- Stay Relevant
- Stay Positive
- True Feedback
- Encourage Discussion
- Avoid Spamming
- No Fake News
- Don't Copy-Paste
- No Personal Attacks
- Be Respectful
- Stay Relevant
- Stay Positive
- True Feedback
- Encourage Discussion
- Avoid Spamming
- No Fake News
- Don't Copy-Paste
- No Personal Attacks
