Perfect Your Look with the Right Webcam Lighting Setup
Published: 12 May 2025
Good lighting is one of the most crucial factors for improving your webcam video quality. Whether you’re streaming on Twitch, joining a Zoom meeting, or recording a YouTube video, proper lighting can make a huge difference in how you appear on camera.
In this article, we’ll explain everything you need to know about setting up your webcam lighting, from basic techniques to advanced tips and product recommendations. So let’s dive in.
How to Set Up Basic Webcam Lighting
Before diving into complex setups, let’s start with the basics. A simple, effective webcam lighting setup can often be achieved with just a few key elements.
Key Light
The key light is your primary light source and should be positioned in front of you, slightly above eye level, at a 45-degree angle. This will help brighten your face evenly.
A softbox or ring light is a great choice for a key light because it diffuses the light and softens any harsh shadows.
- Tip: Make sure the light is diffused properly to avoid direct light hitting your face, which can lead to glare or overexposure.
Fill Light
The fill light is placed on the opposite side of your key light and is usually softer or dimmer. Its purpose is to reduce shadows on your face caused by the key light.

- Tip: You can use any soft light here, like a desk lamp or a smaller LED panel, just be sure it’s not as bright as your key light.
Backlight (or Hair Light)
A backlight adds depth and contrast to your shot, separating you from the background. It should be placed behind you and directed towards your back or head.

- Tip: Avoid using too strong backlighting because it can create a shadow effect, making you appear dark and hard to see.
Advanced Lighting Tips for Professional Webcam Quality
Now that we’ve covered the basics, let’s explore some more advanced techniques that will take your webcam lighting to the next level.
Three-Point Lighting Setup
The three-point lighting setup is perfect for creating attractive, professional lighting in any environment. It uses the three lights mentioned above—key light, fill light, and backlight—to create depth and evenly light your face.
This setup is commonly used in filmmaking, photography, and live streaming because it creates the most flattering lighting for your face.
Color Temperature and Tone
The color temperature of your lights has a big impact on the look and feel of your video. Lights are measured in Kelvin (K), and the temperature affects the warmth or coolness of the light:
- Warm light (below 4000K): Creates a cozy, inviting atmosphere, which is perfect for casual settings, content creation, or streams.
- Cool light (above 5000K): Offers a professional, clean look, perfect for video calls, business meetings, and streaming because it improves clarity and sharpness.
Adjusting the color temperature allows you to set the right tone for your video, whether you want a relaxed vibe or a more professional appearance.
Using Diffusers and Reflectors
Both diffusers and reflectors are essential tools for controlling light and reducing harsh shadows:
- Diffusers: These tools soften and spread the light, creating a gentle glow on your face. This is especially useful for reducing glare and harsh shadows that can make you look less attractive..
- Reflectors: Reflectors reflect light back onto your face, helping to fill in shadow and creating a softer, more natural lighting effect. They are great for evening out light when you have limited sources.
The Best Lighting Products for Webcam Setup
When it comes to setting up your computer camera lighting, the right products can make a big difference. Below are some of the best lighting products, each suited to different needs and budgets.
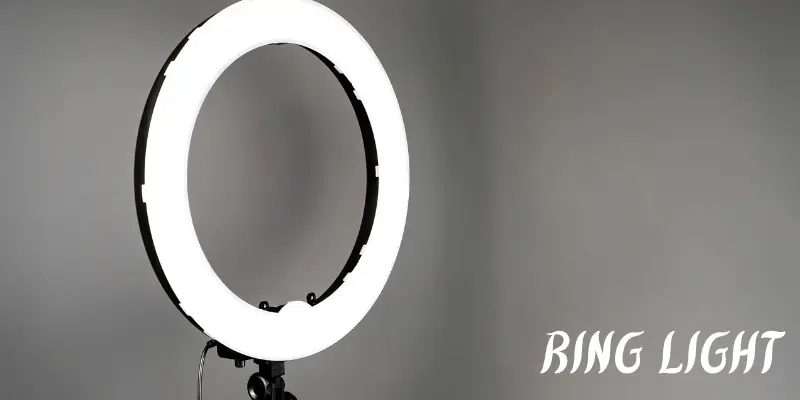
1. Ring Lights
Ring lights provide soft, even lighting, reducing shadows and creating an appealing look, perfect for streamers, YouTubers, and video calls.
| Pros: |
|---|
|
| Cons: |
|---|
|
Best for: Streamers, YouTubers, and Zoom users.
Recommended Product: Neewer Ring Light Kit
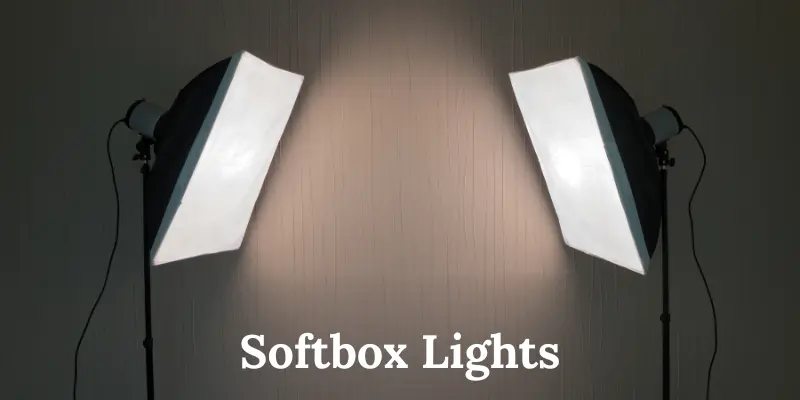
2. Softbox Lights
Softboxes provide diffused light for a more natural, professional look, ideal for content creators and live streaming.
| Pros: |
|---|
|
| Cons: |
|---|
|
Best for: Professional content creators.
Recommended Product: Fovitec Softbox Kit
3. LED Panels
LED panels are compact, energy-efficient, and perfect for streamers and professionals who require high-quality, adjustable lighting
| Pros: |
|---|
|
| Cons: |
|---|
|
Best for: Streamers and professionals.
Recommended Product: Elgato Key Light
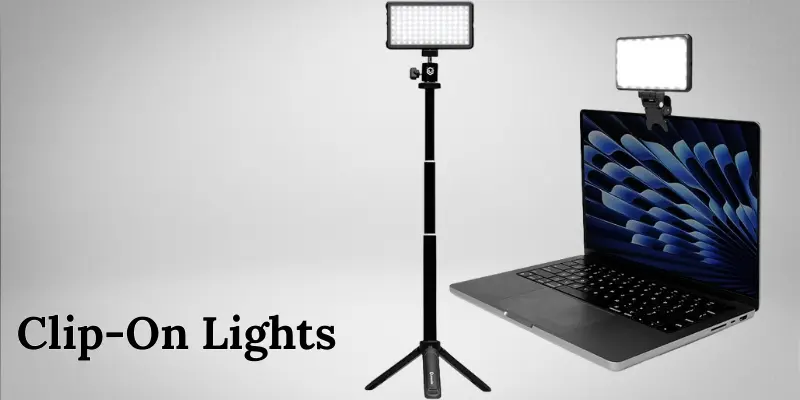
4. Clip-On Lights for Laptops
Clip-on lights are portable and great for quick lighting fixes during video calls or remote work.
| Pros: |
|---|
|
| Cons: |
|---|
|
Best for: Remote workers and small setups.
Recommended Product: Lume Cube Broadcast Lighting Kit
Tips for Webcam Lighting in Different Scenarios
Lighting plays a crucial role in making your webcam setup look professional in different situations. Here are some tips to optimize lighting for various use cases:
- For Streaming: It’s important not just to light yourself but also your background. Position your backlight correctly to generate a “pop” effect, which separates you from the background and adds depth and clarity. This makes your stream look more dynamic.
- For Video Calls: Natural lighting is always a great option. Position yourself near a window to make use of sunlight. However, for best results, add a softbox or ring light to improve the lighting on your face, especially if the natural light is inconsistent.
- For YouTube Videos: A three-point lighting setup is the ideal choice for YouTube recordings. It ensures that your face is evenly lit, giving you a smooth, professional appearance that looks great on camera. To add a creative flair to your videos, consider using color gels or RGB lights to give your content a unique and professional look.
- For Gaming: When streaming or gaming, make sure the key light is diffused properly to avoid creating harsh shadows, which can make your face look unevenly lit and unpleasant. Adding a backlight will help separate you from your background, especially if you’re in a dark area, and make you more visually appealing on camera.
Common Webcam Lighting Mistakes to Avoid
While setting up webcam lighting, even small mistakes can affect your overall look. Here are some common drawbacks to watch out for:
- Not Diffusing the Light Properly: Direct, undiffused lights can create harsh shadows and unflattering highlights on your face. To avoid this, always use a diffuser or softbox to spread the light evenly for a smoother, more pleasing look.
- Too Much Light Behind You: While backlighting can add depth and dimension to your shot, too much backlight can leave you looking like a shadow and make it difficult to see. Balance the lighting around you by adjusting the intensity of the backlight or adding more light in front.
- Ignoring Ambient Light: If you’re using natural light, be careful that it doesn’t clash with your artificial lighting. Mixing different light sources can create inconsistent lighting, leading to uneven skin tones and shadows. Always balance the ambient light with your artificial lighting for a consistent look.
Conclusion
A good webcam lighting setup can significantly improve your video quality, whether you’re working from home, recording content, or streaming for an audience. By understanding the fundamentals of lighting and using the right tools, you can easily elevate your webcam appearance and ensure you always look your best on camera.
Remember, there’s no one-size-fits-all solution. Experiment with different setups to find what works best for your space, budget, and needs. With these tips and product recommendations, you’ll be ready to set up a lighting system that improves your appearance and helps you shine online!
Frequently Asked Questions (FAQs)
Here are answers to some of the most common questions about Webcam Lighting Setup :
A ring light or softbox works best for Zoom calls. They provide soft, even lighting that helps you look clear and professional. These lights also reduce shadows and highlight your face for a polished appearance.
You can improve lighting with a clip-on light for your laptop or an affordable ring light. Both options are budget-friendly but provide great results. Just make sure the light is diffused to avoid harsh shadows on your face.
Yes, you can use a regular desk lamp for webcam lighting. To get the best effect, diffuse the light by softening it with materials like a white cloth. This will help reduce harsh shadows and create a more flattering look.
The three lighting rules refer to using three types of lights for a balanced setup:
- Key light: The main light that brightens your face.
- Fill light: A secondary light that softens shadows from the key light.
- Backlight: Positioned behind you to separate you from the background and add depth to the shot. This setup creates professional, well-lit results.
Ring lights provide even, direct lighting, making them ideal for creating a smooth, consistent look. On the other hand, softboxes offer diffused lighting, which softens shadows and creates a softer, more natural effect. Both are great, but it depends on the look you prefer.
For low light, a ring light is an excellent choice since it provides soft and even lighting. You can also use LED panels that are adjustable in brightness, which helps in dimmer rooms.


- Be Respectful
- Stay Relevant
- Stay Positive
- True Feedback
- Encourage Discussion
- Avoid Spamming
- No Fake News
- Don't Copy-Paste
- No Personal Attacks
- Be Respectful
- Stay Relevant
- Stay Positive
- True Feedback
- Encourage Discussion
- Avoid Spamming
- No Fake News
- Don't Copy-Paste
- No Personal Attacks
