Step-by-Step Guide to Turn On and Use a Webcam on Laptop
Published: 19 Jul 2025
Struggling to use the webcam on your laptop for video calls, online tests, or content creation? Don’t worry, you’re not alone! Many users face challenges when it comes to setting up and optimizing their webcams.
In this guide, we’ll explain everything—from setting up your built-in webcam to connecting external webcams for better video quality. Whether you’re on Windows 10 or Windows 11, we’ll provide easy-to-follow steps and troubleshooting solutions. So, let’s dive in
2. What You Need to Know Before Using Your Windows Laptop Webcam
Before using your webcam, it’s important to know the basics for a smooth setup. Here’s what to keep in mind.
Built-in vs. External Webcam
- Built-in Webcam: Most laptops come with an integrated webcam located at the top of the screen. It’s easy to use and ideal for casual video calls, although the video quality may not be as high as that of an external webcam.
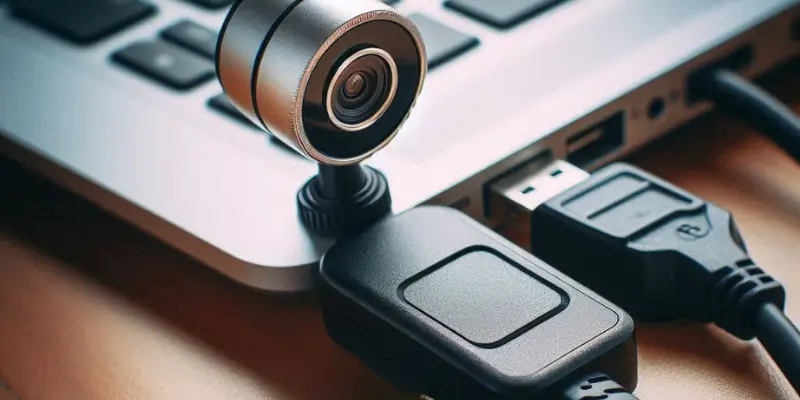
- External Webcam: An external webcam is a separate device that you plug into your laptop through a USB port. It provides better video quality, higher resolution, and extra features like autofocus and lighting adjustments. They’re perfect for content creators or anyone needing higher-quality video.
System Requirements
To use your webcam on Windows 10/11 effectively, your system needs to meet a few minimum requirements:
- Compatible Drivers: Built-in webcams usually work automatically, while external webcams might need drivers from the manufacturer.
- Operating System: Ensure you’re using an updated version of Windows 10 or 11 for better webcam performance.
- USB Ports: If using an external webcam, check you have available USB 3.0 ports for faster data transfer.
- Performance: For smooth webcam use, ensure your laptop has at least an Intel Core i3 or higher, with 4GB RAM or more.
Brands
While most laptops are compatible with webcams, there are a few brand-specific considerations that can improve your experience:
- Dell: Known for good built-in webcams, but update drivers through Dell SupportAssist for the best performance.
- HP: Offers high-quality webcams for general use, and external webcams work well with HP laptops.
- Lenovo: Many models have HD webcams, but you may need to use Lenovo Vantage to adjust camera settings. For external webcams, ensure your Lenovo drivers are up to date to avoid compatibility issues.
In all cases, always check your specific laptop model for driver updates and compatibility to achieve the best performance from your webcam.
3. How to Use a Laptop Built-in Webcam (Windows 10/11)

Before using your webcam, make sure the privacy settings allow the Camera app to access it. Here’s how to turn on the camera on your laptop:
Step 1: Check your Laptop’s Privacy Settings
1. Click on the Start menu (Windows icon) located at the bottom of your screen.

2. Go to the Settings

3. Choose the Privacy option.

4. In the search bar at the top, type “Camera” and go to Camera Privacy Settings.
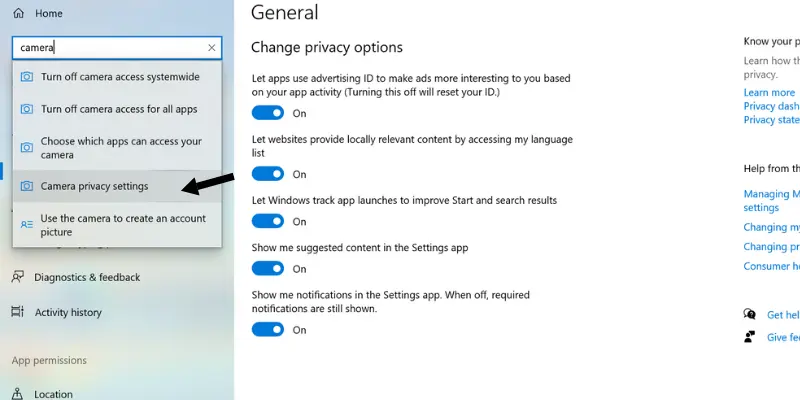
5. Toggle the “Allow apps to access your camera” option to On. Also, ensure that the apps you want to use with the webcam (e.g., Zoom, Skype) have permission to access the camera.
- For Windows 11: The steps are similar, but the interface may look slightly different. Go to Settings > Privacy & Security > Camera, and make sure camera access is allowed for apps.
Step 2: Open the Camera App
- Open the Start menu and type “Camera” in the search bar.
- Click on the Camera app from the search results to launch it.

Step 3: Test the Webcam
Once the Camera app is open, you should see the live feed from your webcam.

If you don’t see anything, double-check that the camera is enabled in your privacy settings.
Step 4: Adjust Webcam Settings
- In the Camera app, click the Settings icon (gear) to adjust brightness and contrast.
Now your built-in webcam should be set up and ready to use! Next, let’s look at how to use an external webcam.
4. How to Use an External Webcam on a Laptop
For better video quality or extra features, an external webcam is a great option. Here’s how to set an external webcam on a laptop:
Choosing the Right External Webcam
When selecting an external webcam, consider popular and reliable brands like:
- Logitech: Known for high-quality video and audio.
- Microsoft: Offers great plug-and-play options for casual and professional use.
Step 1: Connect the External Webcam
- Plug the external webcam into a USB port on your laptop.
- Windows should automatically detect and install the necessary drivers; if it doesn’t, proceed to the next step.
Step 2: Install Drivers (if necessary)
If your webcam isn’t automatically detected or isn’t working properly, you may need to install drivers manually:
- Visit the webcam manufacturer’s website (e.g., Logitech or Microsoft).
- Download the latest drivers for your webcam model.
- Follow the installation instructions provided by the manufacturer.
Step 3: Set the External Webcam as Default
- Go to the search bar on the left side of your laptop screen.
- Type “control panel” and open the Control Panel.
- Click> Hardware and Sound.
- Click>Device and Printers.
- Right-click on your Webcam and set it as the Default Device.
Step 4: Test the External Webcam
- Open the Camera app to check if the external webcam is working.
You should now see the feed from your external webcam instead of the built-in one.
4. Troubleshooting Common Webcam Issues
Sometimes, even after setting up your webcam, issues can arise. Here are some common webcam problems and how to fix them:
1. Webcam Not Detected
If your webcam isn’t showing up or working, try the following steps:
- Check the USB Connection: Ensure that your external webcam is securely plugged into the USB port. Try using a different USB port to see if that resolves the issue.
- Restart Your Laptop: A simple restart can sometimes resolve hardware detection issues.
- Update Drivers: Go to Device Manager > Imaging Devices, right-click on your camera, and select Update driver to ensure you have the latest version.

2. Webcam Feed is Not Showing
If you open the Camera app and the webcam feed is blank:
- Check App Permissions: Ensure the app you are using (e.g., Zoom, Skype) has permission to access the webcam. You can check this in Settings > Privacy > Camera.
- Close Other Apps: If another app is using the camera, it might prevent others from accessing it. Close any other applications that might be using the webcam.
3. Poor Video Quality
If the video quality from your webcam isn’t up to standard:
- Adjust Lighting: Ensure you are in a well-lit area. Avoid backlighting, which can cause the camera to appear dark.
- Adjust Camera Settings: In the Camera app, click on the Settings icon to adjust brightness, contrast, and other settings.
- Check the Resolution: For external webcams, ensure you’re using the highest possible resolution setting available in your webcam software or through the camera app.
4. Webcam Audio Not Working
If the video is fine, but there’s no audio:
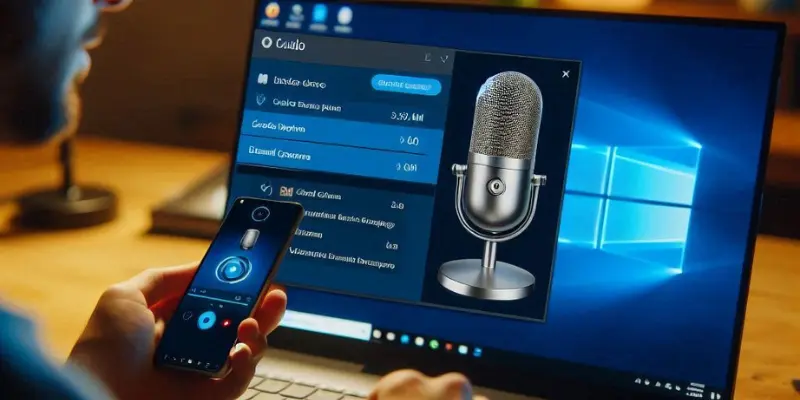
- Check Microphone Settings: Make sure that your laptop’s microphone is selected as the default audio device. You can do this through Sound Settings.
- Enable Microphone Access: Go to Settings > Privacy > Microphone and allow apps to access the microphone.
5. Webcam Keeps Freezing or Lagging
If your webcam feed is freezing or lagging:
- Close Unnecessary Programs: Too many open applications can slow down your laptop and cause webcam performance issues. Close any unnecessary programs to free up resources.
- Check System Performance: Make sure your laptop meets the minimum system requirements (e.g., Intel Core i3 or higher, 4GB RAM or more) for smooth webcam use.
- Update Your System: Ensure your laptop’s Windows 10/11 and webcam drivers are up to date for the best performance.
Conclusion
Now that you know how to use both built-in and external webcams on your laptop, you should be all set for video calls, streaming, recording, or any other webcam-related task. Whether you’re using Windows 10 or Windows 11, the steps we’ve outlined will help you get started quickly and easily. If you encounter any issues, refer to the troubleshooting section to resolve common problems.
If you found this guide helpful? Share it with a friend who might need it!”
Frequently Asked Questions (FAQs)
Here are answers to some of the most common questions about how to use the camera on a laptop :
By following these steps, you can turn on the camera on Windows 10
- At the bottom of your laptop screen bar. Click on the Windows logo to open the “Start Menu”.
- Type the Camera in the bottom search bar.
- Click on the Camera App and open it
Now your laptop camera is turned on.
Yes, you can use an external webcam with your laptop. Most laptops come equipped with at least two USB ports. To connect your external webcam to your laptop, simply plug its USB cable into one of the available USB ports on your laptop. Ensure the connection is secure, as a loose connection might prevent the webcam from being detected. It provides more high-quality video than a built-in webcam.
If your laptop runs Windows 7, you can use its camera by following the steps below.
- Go to the Window Icon
- Type camera /webcam in the search bar
- Choose the Camera application
- Open it
You can also go to the camera settings and adjust the brightness and other image settings.
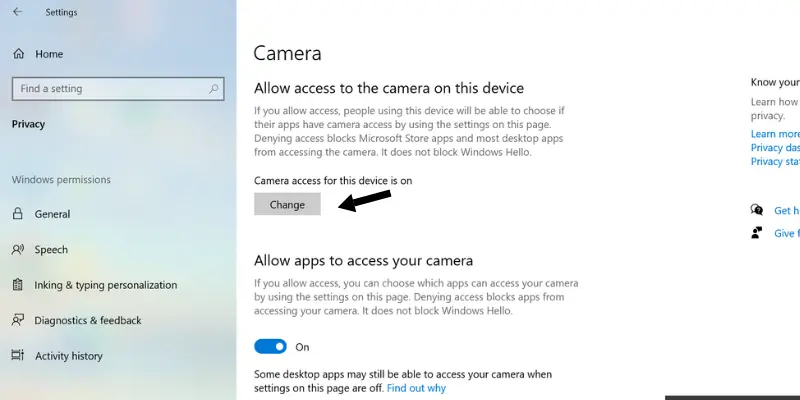
To enable the camera on the laptop. Follow these steps
Window logo/Icon > Settings > Privacy > Camera > Camera access for this device>On
Nowadays, many laptops come with built-in webcams. The webcam is usually located at the top of the laptop screen, inside a small hole. A light next to it also turns on when the webcam is activated.
To record a video with your laptop’s webcam, open the Camera app, and click the video icon to start recording. You can also use third-party software like OBS Studio or Zoom for higher-quality recordings and additional settings.
It’s generally safe, but for privacy, some people prefer unplugging external webcams when not in use. You can also cover the lens with a webcam cover or disable it in settings to prevent unwanted access. Regularly checking camera permissions adds an extra layer of security.
Plug in your external webcam, then go to your video app’s settings and choose it as the camera source. For a permanent switch, you can disable the built-in webcam through Device Manager. This ensures the external webcam becomes the default device.


- Be Respectful
- Stay Relevant
- Stay Positive
- True Feedback
- Encourage Discussion
- Avoid Spamming
- No Fake News
- Don't Copy-Paste
- No Personal Attacks
- Be Respectful
- Stay Relevant
- Stay Positive
- True Feedback
- Encourage Discussion
- Avoid Spamming
- No Fake News
- Don't Copy-Paste
- No Personal Attacks
