How to Use an External Webcam on Chromebook (Easy Guide)
Published: 2 Oct 2025
If you’re looking to improve your video quality for online meetings, classes, or even content creation, using an external webcam with your Chromebook is a simple and effective solution.
In this guide, we’ll show you how to easily connect and set up your external webcam, troubleshoot any issues, and optimize its performance. Without wasting time, let’s get started!
How to Set Up an External Webcam on a Chromebook
Follow these simple steps to easily set up and optimize your external webcam on your Chromebook:
Step 1: Choose the Right Webcam
To get started, select a USB webcam compatible with your Chromebook. Look for these key features:
- 1080p resolution or better for clear video.
- Auto-focus for sharp, consistent video.
- Good low-light performance for better video in dim environments.
Popular models include:
- Logitech C920
- Microsoft LifeCam HD-3000
These are excellent choices for video calls, streaming, and content creation.
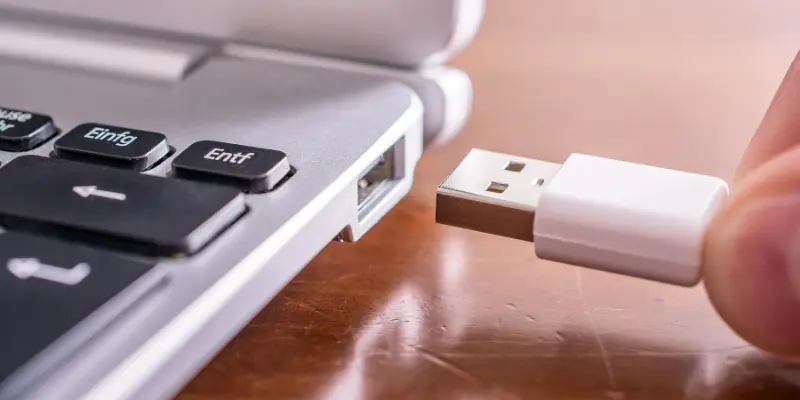
Step 2: Connect the Webcam to Your Chromebook
Next, plug the webcam into one of your Chromebook’s USB ports.
- Chromebooks support plug-and-play, meaning it should work right away without needing extra drivers or software.
If you’re using a wireless webcam, follow the manufacturer’s instructions to connect it through Bluetooth or Wi–Fi.
This step ensures your webcam is physically connected and ready to use.
Step 3: Set the External Webcam as Default
Once the webcam is connected, open the Camera app to set it as the default. By default, your Chromebook may use the built-in webcam, but you can easily switch to the external webcam:
- Search for “Camera ” in the launcher and open it from there.
- Click the gear icon to go to settings.
- Select your external webcam from the available camera options.
Step 4: Test the Webcam
Now that your external webcam is set as the default, it’s time to test if everything is working properly:
- Close the Camera app if it’s already open, then reopen it.
- You should see the feed from your external webcam. If it’s clear, you’re all set to go!
If the built-in webcam is still showing, double-check that your external webcam is selected as the default in the Camera app’s settings.
| 💡Pro Tip: |
|---|
If you want a more detailed test, you can use our Webcam Test Tool to check the resolution, focus, and other advanced settings. |
Troubleshooting Tips for Common Webcam Issues
Sometimes, even after following all the steps, things might not work as expected. Don’t worry! Here are some common issues and their solutions:
1. Webcam Not Detected

If your Chromebook doesn’t detect your external webcam, try these fixes:
- Reconnect the webcam: Unplug it and plug it back into a different USB port.
- Restart your Chromebook: A quick restart often fixes connection issues.
- Check Chrome OS updates: Make sure your Chromebook is running the latest version of Chrome OS. Go to Settings > About Chrome OS > Check for Updates.
2. Poor Video Quality
If the video quality isn’t as good as expected, try the following:
- Adjust the settings: Open the Camera app and adjust the settings to improve clarity or brightness.
- Check the lighting: Poor lighting can make video quality drop. Make sure you’re in a well-lit area or consider using ring lights for a more professional look.
3. Microphone Issues

Are you having trouble with your microphone? Try these quick fixes to get it working again.
- Go to Settings > Device > Audio and select the webcam microphone.
- Test the mic in a video call or app to make sure it’s working properly.
4. Video Flipping Issue
If your video is flipped or you want to adjust its position, follow these steps:
- Open the app you’re using (e.g., Zoom, Google Meet, or the built-in Camera app).
- Go to the video settings within the app.
- Look for options like “Flip Camera” or “Mirror Image” and enable or disable them as needed.
This is especially useful if your webcam’s position does not match your preferences or settings.
| 💡Tip: |
|---|
If your external webcam still isn’t working on Chromebook, check out our detailed article on troubleshooting webcam issues on Chromebook for more in-depth solutions. |
Advanced Webcam Features and Tips
Once your external webcam is working, you can take it a step further by using advanced features and smart tips to get the best video quality.
1. Use Background Blur or Virtual Backgrounds
A messy background can distract your viewers. Using blur or virtual backgrounds helps keep the focus on you.
- Open your video app (Google Meet, Zoom, or Teams).
- Go to Settings > Video.
- Choose Blur Background or pick a virtual background from the options.
- Test it before your meeting to see what looks best.
You May Also Like This Post
➡️ How to Change Webcam Background in Google Meet
➡️ How to Change Your Webcam Background in Zoom
2. Adjust Camera Angles for Better Framing
Your camera angle can make a big difference in how professional you look on screen.
- Place your webcam at eye level for a natural conversation view.
- Use a tripod or stack books under your Chromebook to adjust the height.
- Center yourself in the frame so your face and shoulders are clearly visible.
3. Optimize Lighting for Professional Results
Good lighting makes your video look sharp and clear, even on a basic webcam.
- Sit facing a window or light source so your face is well-lit.
- Avoid sitting with a bright light behind you.
- For evening calls, use a ring light or desk lamp placed in front of you.
4. Explore External Webcam Software
Some webcams come with extra features like zoom, tilt, and color control for more flexibility.
- Check your webcam brand’s website for a web app or Chrome OS tool.
- Adjust settings like brightness, contrast, and zoom to suit your environment.
- Save your settings for quick setup in future calls.
Conclusion
Now that you know how to set up and use an external webcam on your Chromebook, you can enjoy clearer video and a more professional look in just a few minutes. With the right settings, good lighting, and a few advanced tips, your online classes, meetings, and recordings will always stand out.
FAQs (Frequently Asked Questions)
Here are answers to some of the most common questions about using an external webcam on a Chromebook.
Most USB webcams work with Chromebooks without extra setup. Just plug the webcam into a USB port, and it should connect automatically. If the camera turns on in apps like Google Meet, it’s compatible.
No, Chromebooks don’t need extra drivers for most webcams. Once you plug in the webcam, Chrome OS detects it automatically. You can then select it in your video app’s settings.
Enabling an external camera in Chrome is simple. Follow these steps:
- Connect the webcam to your Chromebook and make sure it is recognized.
- Open Chrome and go to the website or app where you require the camera.
- Allow camera access when asked.
- If needed, select an external webcam from the site’s video settings.
Most Chromebooks don’t have a physical camera switch. To access the camera, first click the Launcher (a circular icon in the bottom-left corner), then expand the apps menu by clicking the upward arrow, and select the Camera app. To switch cameras, look for the “Switch Camera” button on the screen—it’s usually represented by a circular arrow icon on the left-hand side.
First, unplug and replug the webcam into another USB port. Restart your Chromebook and check the camera settings in Chrome or Google Meet. If it still doesn’t work, test the webcam on another device to confirm it’s not faulty.
Yes, most Chromebooks come with a built-in webcam. However, if you’re looking for better quality, you can easily connect an external webcam through USB.
Open the Camera app from your app menu. Then click the “Flip” or “Mirror” icon (two arrows in a circle). Your camera view will instantly switch so you can adjust it the way you like.
Simply plug your USB webcam into a USB port, open the Camera app, and select the external webcam from the settings.


- Be Respectful
- Stay Relevant
- Stay Positive
- True Feedback
- Encourage Discussion
- Avoid Spamming
- No Fake News
- Don't Copy-Paste
- No Personal Attacks
- Be Respectful
- Stay Relevant
- Stay Positive
- True Feedback
- Encourage Discussion
- Avoid Spamming
- No Fake News
- Don't Copy-Paste
- No Personal Attacks
